Can You Upload Garageband Podcasts to Wordpress
Introduction
Starting a podcast tin be a daunting job for offset timers, with then much equipment and software to learn most earlier get-go. However, GarageBand is a fantastic piece of software that can make creating a podcast easier than yous might think. It has all the tools yous demand to produce a professional-sounding podcast with ease. For a complete form on podcasting in GarageBand, consider this Lynda grade, which is a beginner level course that'll take you near 2 hours to consummate.
Exploring the Interface
Get-go by opening upwardly GarageBand and selecting the microphone option nether "Audio." Click on "details" so you can ensure you lot're capturing the sound you want. If you plan on using the computer's built in microphone and speakers (which is not appropriate), you can leave these settings every bit they are on "System Settings." If you're planning on using a headset and microphone (which will result in a college quality podcast), so select "Congenital-in Microphone/Output" from the driblet down menus. When this is ready, select "Create."
Y'all're now in your GarageBand project. Take a minute to explore this interface. For a more detailed look, attempt a Lynda tutorial.
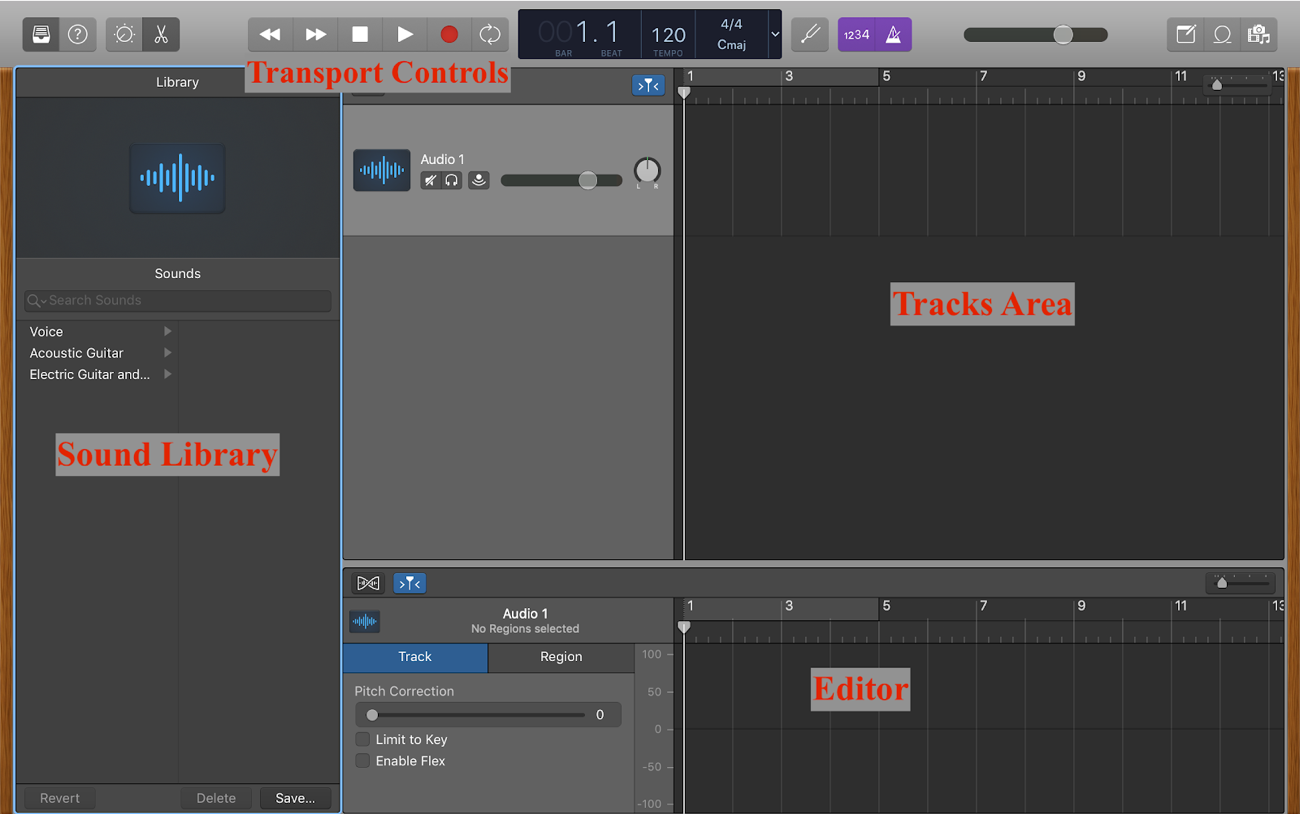
Here nosotros can see our 3 chief regions: the sound library, the tracks expanse, and the editor. At the top is the control bar, with the transport controls for playback of audio.
Menu Bar
![]()
This is where you'll find the majority of your functions and commands. You lot'll likely be using mostly "File," "Share," "View," and "Edit," though the Aid button is always useful if you get stuck.
Control Bar

To the right of the same send controls is the display, where you tin keep beats/tempo for musical projects. To the left of the transport controls are the editor/smart controls buttons, which we'll go into greater detail on after. To the left of that are the library and quick help buttons. If y'all find yourself getting lost, the quick help push is a great resource. When toggled, tips for using the interface are shown when you hover over buttons.
Tracks Area
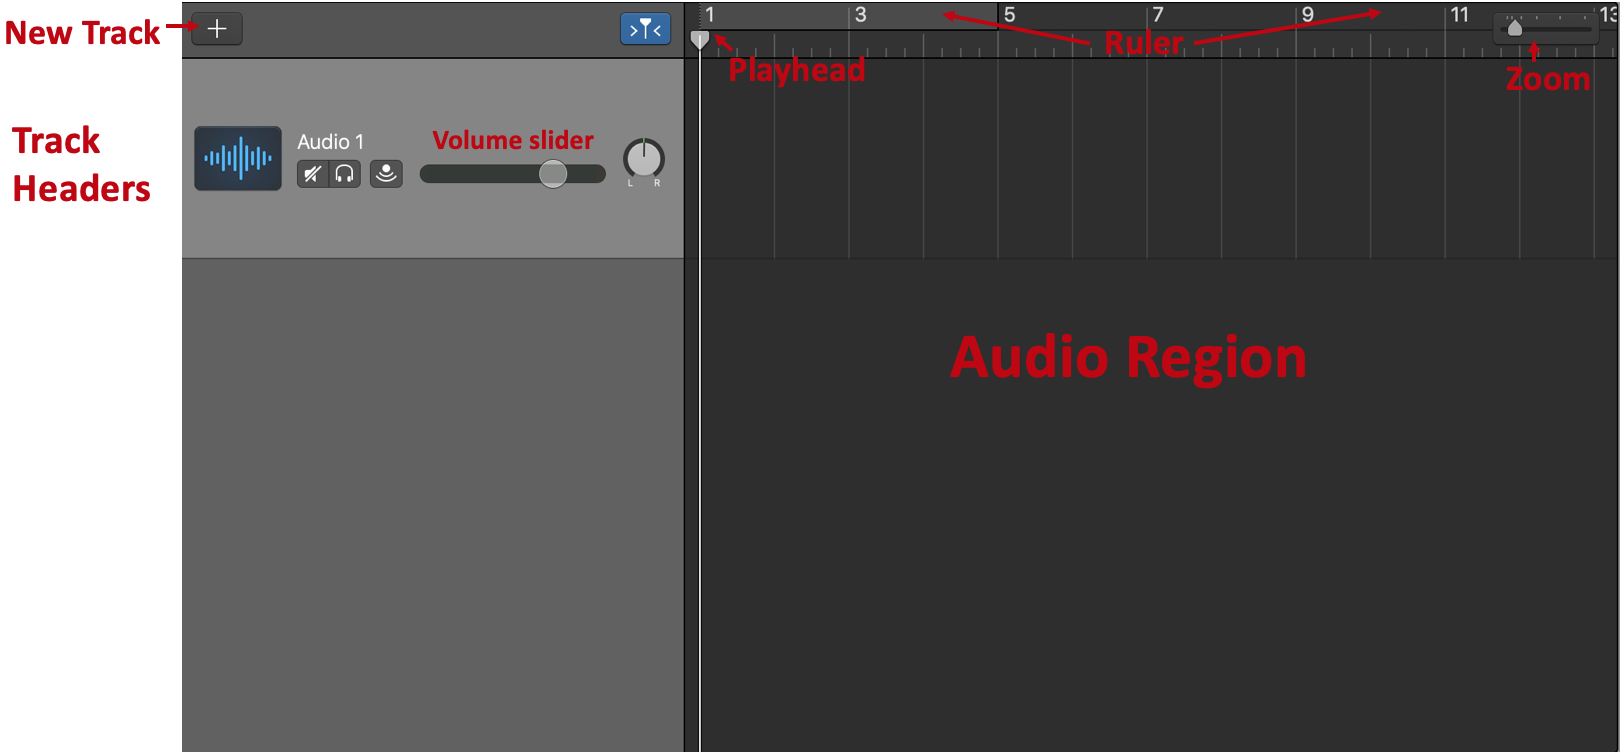
This is your main piece of work area. It will brandish all of your project's audio tracks. Add a new ane by clicking the "New Runway" button, and manage them nether your runway headers. The waveform for your audio rail will announced on the right in the audio region, where y'all tin can utilise the playhead to play back portions of information technology. The zoom button can be used to zoom in and out of your audio tracks—zoom in for fine tuning, zoom out for an overview.
Solo and Mute
![]()
When you're editing chunks of sound together, you may notice that yous want to listen to only a sure rail at a time, or all tracks except for ane. You tin do this using the Solo and Mute options located in your sound rail. They can be found nether the championship of the track (which generally defaults to Audio 1/2/3) and await similar a pair of headphones and a typical mute button.
![]()
Clicking on the Solo button will mute all other tracks in your projection.
![]() Clicking on the Mute button volition mute only that track, and you lot'll hear all of your other tracks. You lot tin can mute multiple tracks at once by clicking on that button in their rails headers.
Clicking on the Mute button volition mute only that track, and you lot'll hear all of your other tracks. You lot tin can mute multiple tracks at once by clicking on that button in their rails headers.
Audio Editor
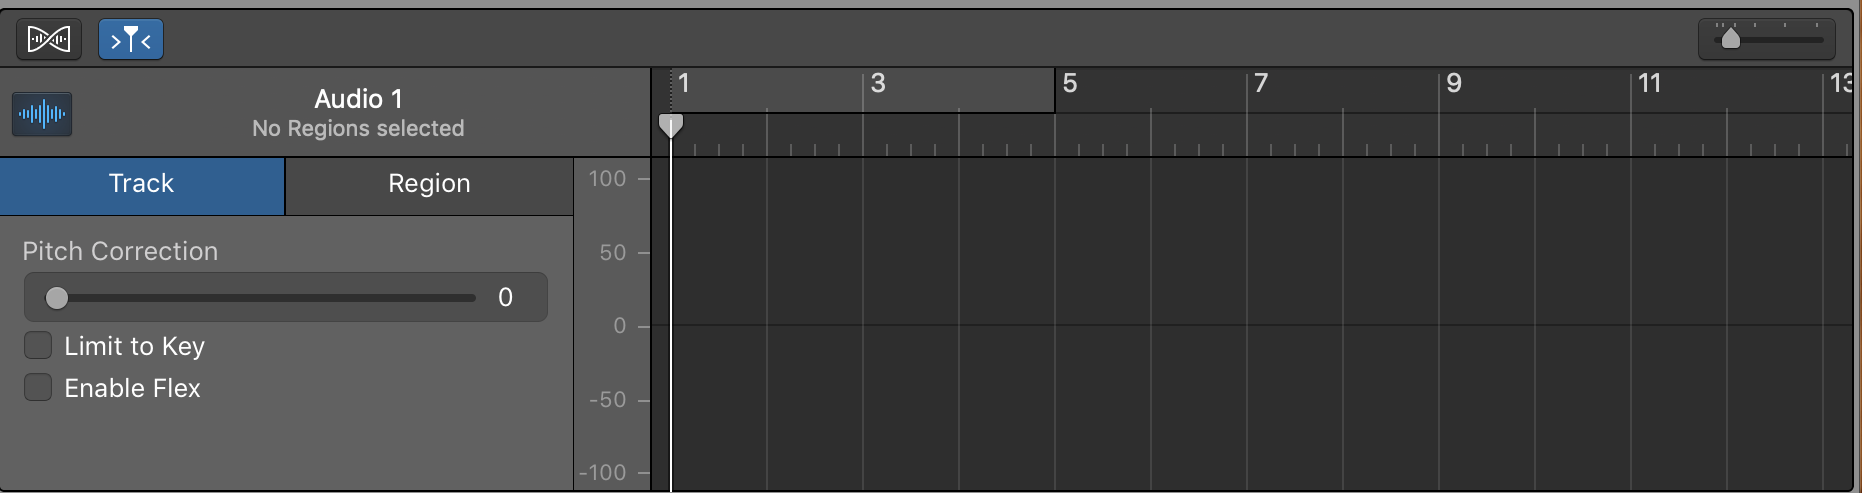
The Audio Editor gives you lot a better view of your audio rails and allows you to edit it. It has its ain version of the playback head, ruler, and zoom.
You may feel that this interface is too decorated. A lot of what's on the screen, at this point, is superfluous. To make the whole journey of creating a podcast an atrocious lot easier, let'south customize our interface.
Customizing the Interface
All of these steps are, of form, optional. You lot may desire the metronome on and the library open at all times, and if that's how y'all prefer to create your podcast, and so keep as you were. For beginners, though, those things may be distracting. Here are a few steps you tin can accept to simplify your interface:
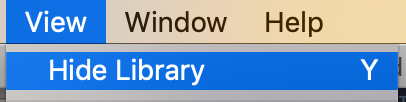
- The interface is very clustered. Permit's make more room to view our audio tracks by closing the library. Yous can do this in the menu bar past clicking View –> Hide Library.
- Make sure you have your editors panel visible, non your smart controls. Yous can do this 2 ways. Start, y'all can toggle information technology in the top left corner of your command bar every bit mentioned before. The editors button is the pair of pair of scissors. Yous can also practise this past once again going to View –> Show Editor.


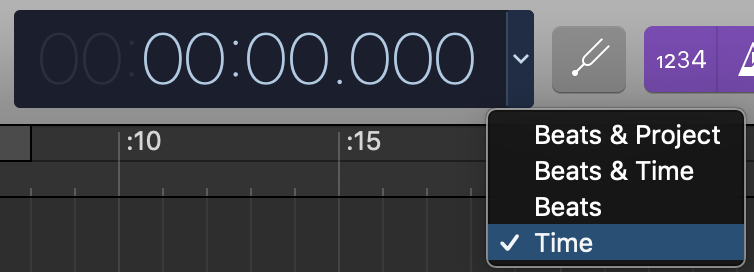
- You lot probably don't demand to speak to a trounce. Let'southward toggle the display to show Time rather than Beats. Do this by clicking the drop-down arrow next to the display and selecting "Fourth dimension."
- The metronome function is useful for keeping a beat when y'all're making music, but you likely don't desire it clicking while y'all're recording your podcast. Plough information technology off by clicking the triangular push button to the correct of the display. To the left of the metronome button is the count in button. Information technology'll give you a couple of clicks before recording begins and so you lot tin catch your jiff. Whether or not you lot apply this is up to preference, just you can toggle it off using the 1234 push. Purple ways it is toggled on; grey ways it is off.

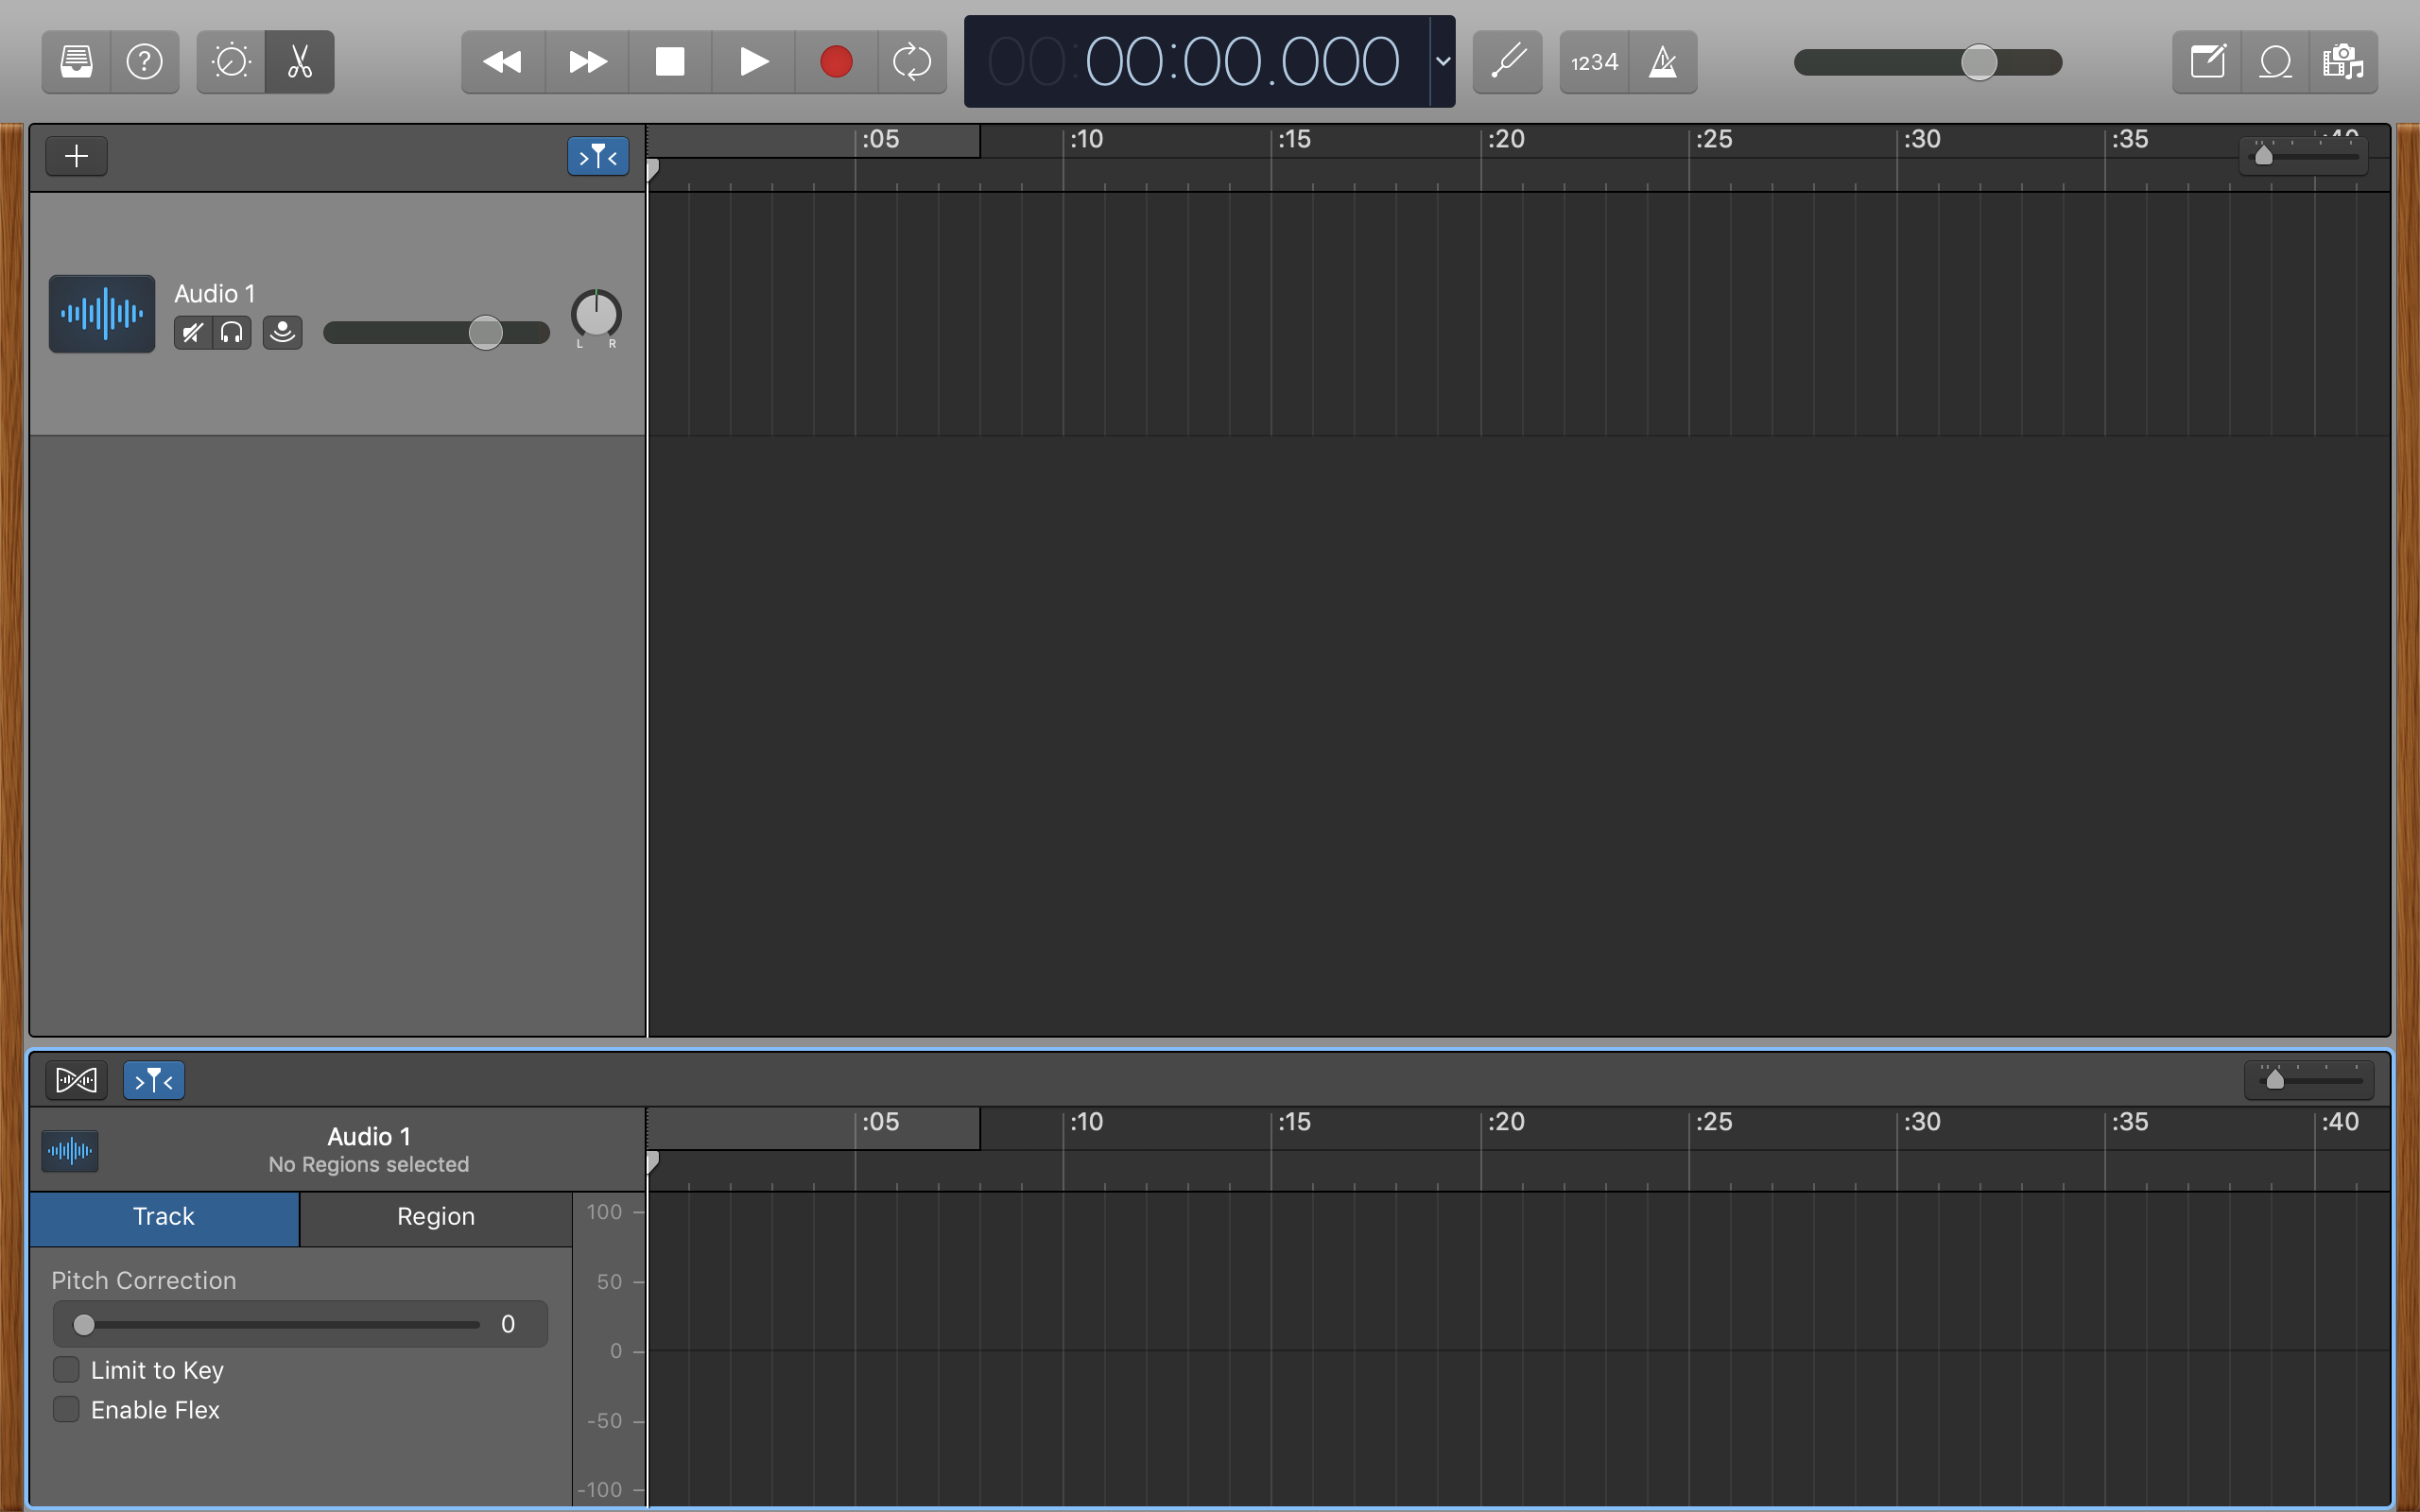
Here'southward what your interface should look like now.
Calculation Audio to Your Project
You can add audio to your projection in 1 of ii ways: import pre-recorded files, or tape directly into GarageBand. To exercise either you must first add a new audio rail.
- Navigate to your tracks area again, and click the plus sign in the top left corner to add a new track.

- You'll be prompted once more to choose a rails blazon. Repeat the process outlined earlier to open an sound rails with the appropriate input and output for audio.
- An empty audio runway will appear in your tracks area.
Importing Audio Files
If you've already started recording your podcast elsewhere, you'll want to import those audio files into GarageBand for editing. You can practise this fairly quickly.
- Create a new audio track following the previous instructions.
- Click and drag the sound file from your desktop to the audio tracks area.
- A blue rectangle volition announced, showing you lot where your audio rail will sit in the project timeline. If it looks good to you, release the file and it'll be added to your project timeline. GarageBand will likely automatically change the name of the track to match the file name; if non, you tin can modify it by double clicking the track proper name.
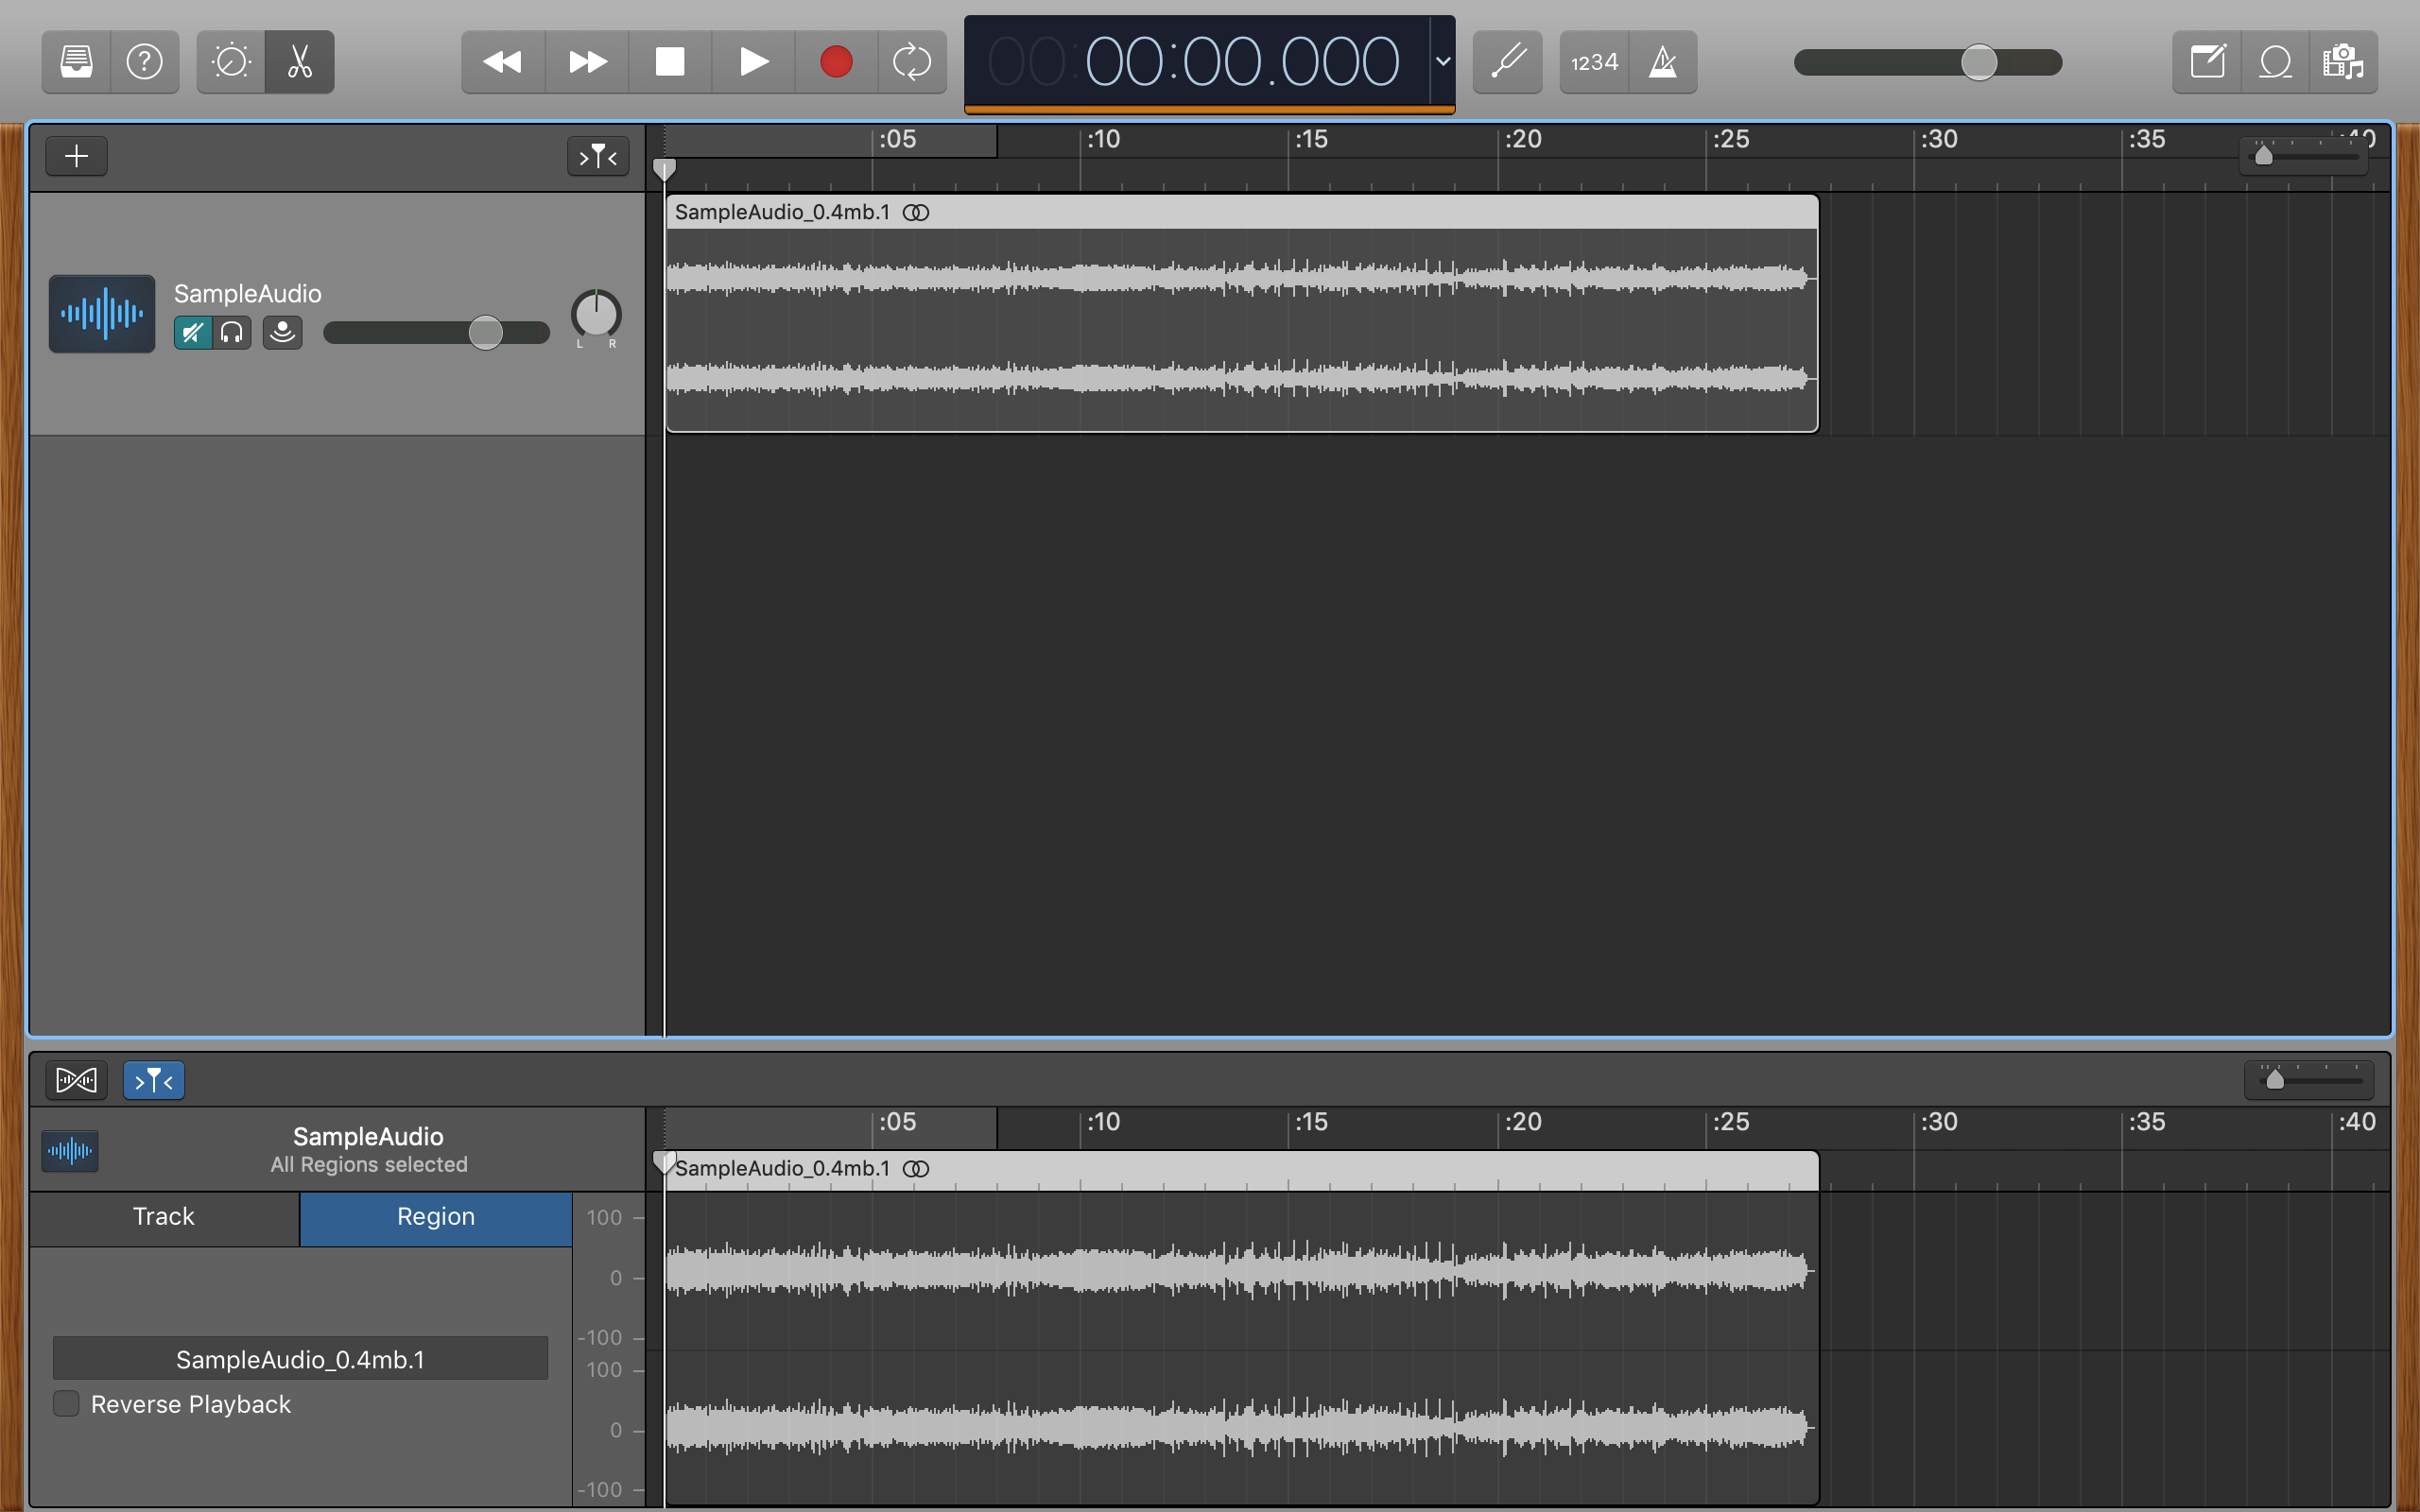
Here's what everything will look similar in one case your file is imported.
Recording in Garageband
If you'd prefer to record directly in GarageBand, you can do so fairly easily.
- Create a new audio track post-obit the steps outlined above.
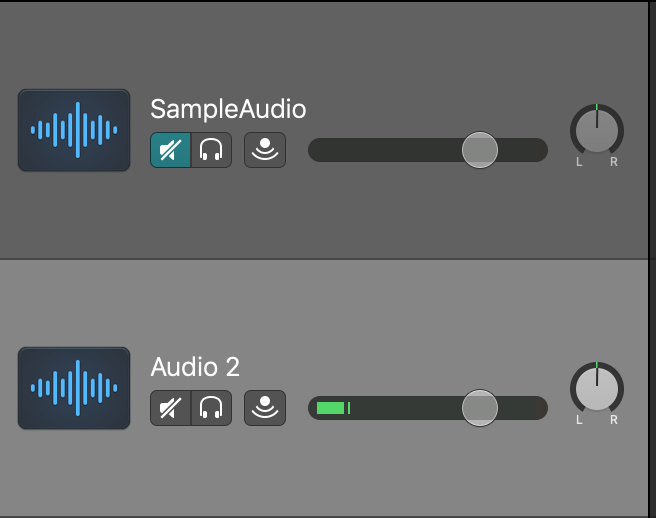
- If you take multiple tracks, you'll desire to make sure you record on the correct track. Do and so by clicking the rail header—it'll appear a lighter colored greyness than the balance of the tracks if information technology is selected. Here, Audio 2 is selected. You may also want to mute all other tracks; you tin can do this past post-obit the Solo and Mute instructions earlier in this tutorial.
- When you're ready, click the cherry-red tape push button and begin speaking.

- When you lot're finished, click this button once again to terminate. Alternatively, you tin click the Cease button, which will stop both recording and playback.

If you end recording and decide that yous don't like what you've recorded, you tin hands delete information technology by clicking the track area and pressing delete, then repeat the steps above.
Recording Additional Sound in the Aforementioned Track
If you've already recorded and make up one's mind that you desire to record more in the aforementioned track, you can practice this fairly easily.
- Drag the play head to the indicate in the track where you want recording to begin.
- Start recording following the steps outlined to a higher place.
Editing Tracks
Deleting Tracks
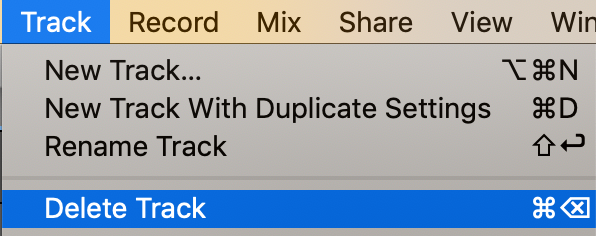
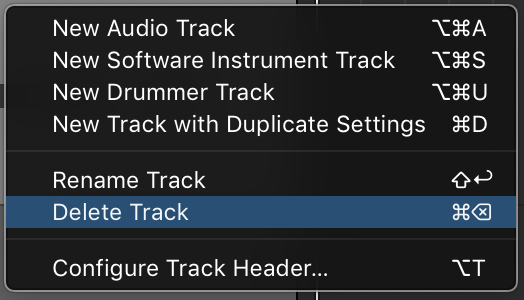
If something but doesn't come out the way that you'd hope, don't worry. Yous tin delete the runway easily past clicking on the track header and pressing the delete push on your keyboard, or go to Track -> Delete Track in the Menu. You lot tin can besides right click on the rails and select "Delete Rail."
Rearranging Tracks
Rearranging tracks is piece of cake in GarageBand. Do so by simply clicking and dragging the rail to the position you want it in.
Rails Volume
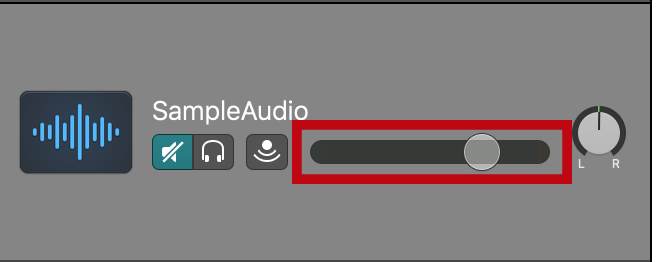
You tin can change an individual runway's volume using the volume slider in the Runway Header.
Locking a Track
If you lot've finished with a item track and want to forestall changes to information technology, you may wish to lock the track.
- In the GarageBand card, select Track -> Configure Track Header.

- When the Buttons window appears, check the "Track Lock" box and the option to lock tracks will announced in your track header.
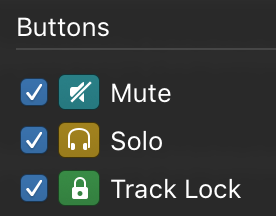
- To lock a track, simply toggle the lock push in the header.
![]()
![]()
Editing Audio Regions
To make a podcast, you lot'll take to practice a bit of audio editing. It may seem intimidating, but breaking information technology into discrete steps can help it to seem easier.
Arranging Audio Regions
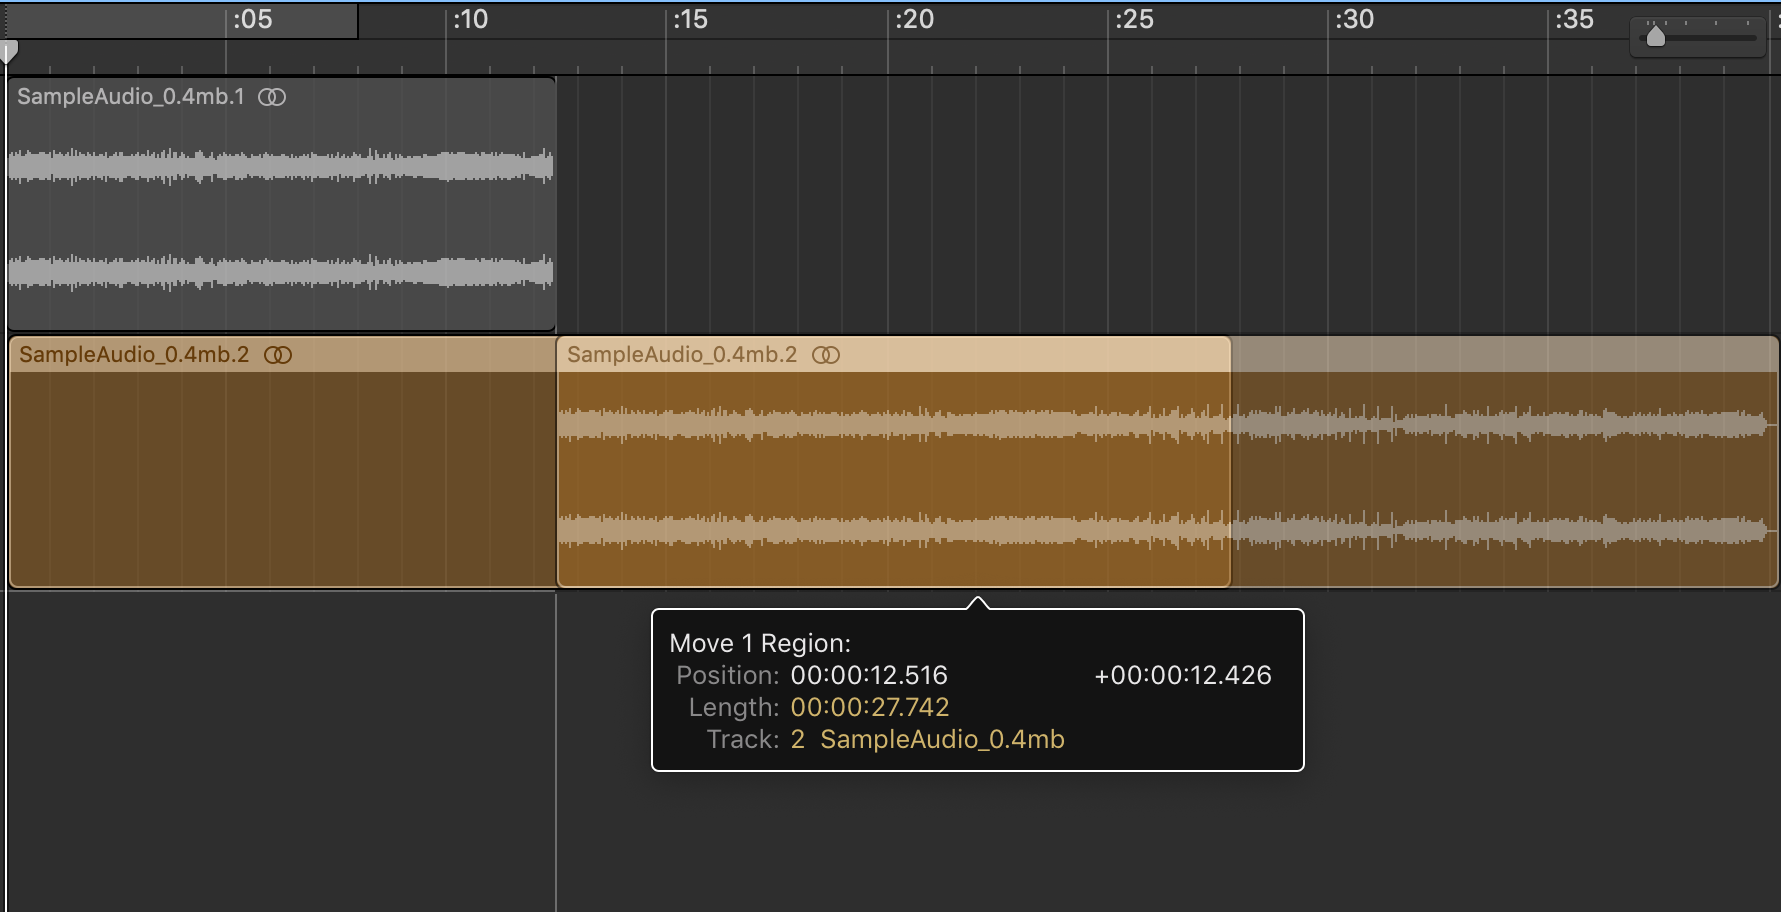
You lot can change the time a rails begins past clicking and dragging the rails's audio region (not the track header) horizontally beyond the projection timeline. This can exist done if, for instance, y'all have introduction music and you want to begin your speaking runway after the music has concluded.
GarageBand will show you the new audio region in brighter color and the previous location in a dulled color. You can elevate it back and along to get the location just right.
Splitting Audio Regions
You lot may want to split your runway into pieces; this could be to remove an extended silence in an interview, or insert sections of 1 audio track into another, or any number of reasons. Information technology'due south too a fairly straightforward technique.
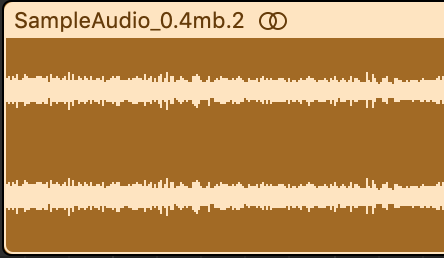
- Click on the audio rails you lot want to split up. Its header volition become a lighter color, showing yous that information technology is selected.
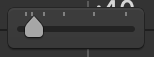
- It might benefit you lot to run into the audio track in greater particular to be able to split it in exactly the right spot. Y'all can utilise the zoom slider in the top right corner of the tracks area to zoom in and out until you're satisfied.
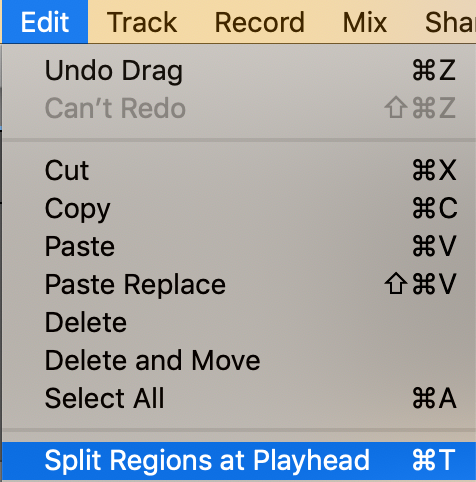
- Drag the playhead to where you want to split up the track.
- In the Carte, select Edit -> Split Regions at Playhead.
You lot can then delete or move your split audio regions by pressing delete or clicking and dragging your audio segment to your desired location in the Timeline.
Trimming
Trimming allows you to crop the get-go or end off of an audio track, and is an easier way to quickly remove excess noise/silence at the outskirts of your track than splitting.
- Click on the region you lot wish to trim to select it.
- Mouse over the lower left or lower right (depending on if you want to trim the beginning or end) of the audio region.
- Your cursor will turn into a <]> symbol; when it does, you can so click and elevate backwards or forwards to trim the commencement or end off the track.
Varying Volume Inside a Region
If y'all're calculation music to your rails, yous'll probably want to lower its book and then as not to interfere with the spoken tracks. GarageBand has a built in tool to help with this.
- Click the track header of the track you want to modify.
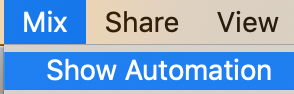
- In the carte, click Mix -> Show Automation
- A new drop downward menu will announced in the track header, every bit well as an Enable Automation button.


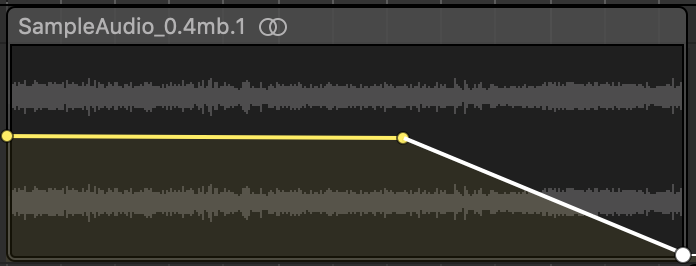
- Click once in the audio region. A yellow line will appear through the track. You lot can click and drag this line around the audio region to adjust the volume level at different points throughout the track. The xanthous circle at the first of the line is where the lowered book will begin, and the lower down you drag the line the quieter information technology will exist.

- Past double clicking at points along the line, you tin add more than automation segments that can have contained volumes. This is an excellent tool to make fade-ins and fade-outs.
Using the Audio Editor
The audio editor will show the audio region(s) of the currently selected rail.
Selecting Part of an Audio Region
Y'all can use the editor to select specific sections of an sound region to edit.
- Select the track y'all desire to work on by clicking on information technology in the tracks area.
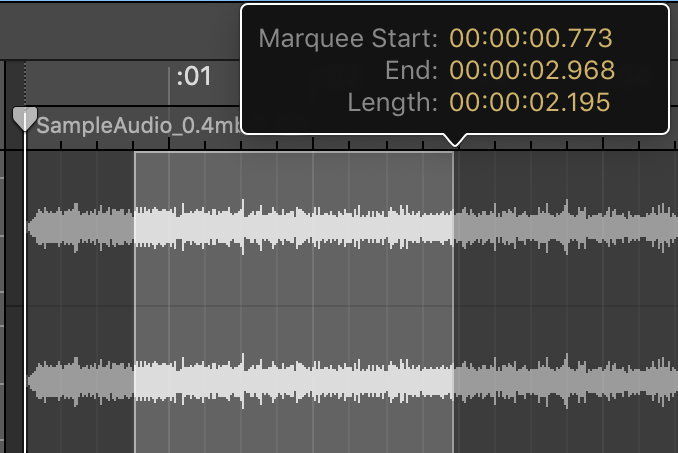
- Move your mouse over the lower one-half of the audio region in the sound editor. Yous should meet a crosshairs (or marquee) pointer appear instead of your usual cursor.
- Click and elevate the marquee over the section of audio you desire to edit in the lower half of the editor. The area you selected will be highlighted.
- Once selected, yous tin now cut/re-create/paste as that segment.
Setting Terminate Point
Past default, GarageBand will prepare an end signal at 1 minute. Information technology will automatically expand to fit any audio tracks you add, simply if yous're trying to move an sound runway past the end point, you lot'll be unable to. You need to move the cease bespeak further back to practice so.
- To change the end point, curlicue horizontally to the end of your project.
- You'll see a small greyness arrow in the upper right corner of the tracks area. If you hover over it, y'all'll once more see the <]> symbol appear in place of your cursor.
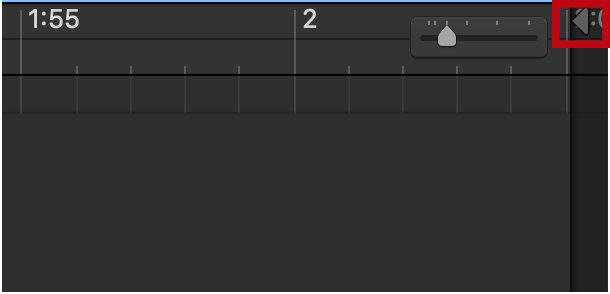
- Click and elevate the pointer to the correct to extend the timeline.
Saving Your Projection
Once you're done putting the finishing touches on your projection, you should save the GarageBand project showtime and foremost, in case you want to come back and edit it more later. You won't be able to do so if you just export it as an MP3. Yous want a saved projection in .band format.
- In the Menu, click File -> Relieve As.
- In the window that appears, give your file a name in the "Save Every bit" field
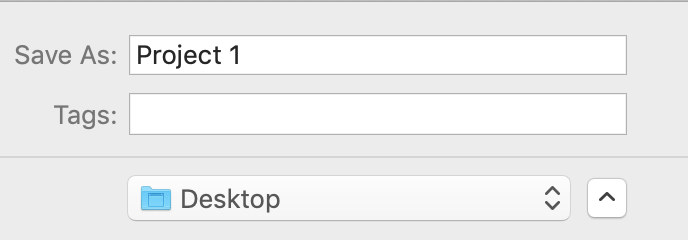
- Select your desired save destination—desktop is the easiest pick, or y'all can salve it in a dedicated folder for your GarageBand projects.
- Click save.
The file will announced in the location you selected. Make sure you back up the file in Google Drive or on a USB so you lot don't lose it, particularly if you're using a reckoner in the MEWS.
Exporting as an MP3
When you're finished and ready to beginning sharing your completed podcast, you'll probably want to save it as a .mp3 file.
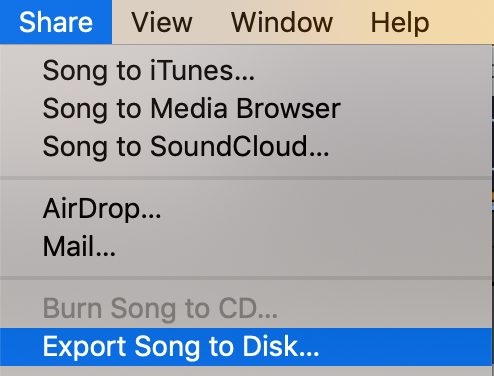
- In the Menu, click Share -> Export Song to Disk.
- In the window that appears, give your file a name and select a save destination. At the bottom, click your desired file format (most ordinarily, this will be .mp3). You lot'll also have the opportunity to choose the quality of your file. This is up to individual users, but Medium or High Quality are nigh common.
- Click Export.
Your file will appear in the desired location, fix to be shared anywhere that accepts .mp3 files. And you're washed! You lot've finished your first podcast episode!
salernoandlegis79.blogspot.com
Source: https://commons.mtholyoke.edu/mewsnews/tutorial-podcasting-in-garageband/
Post a Comment for "Can You Upload Garageband Podcasts to Wordpress"